Making a fine violin varnish
One week of refining oil and resins to create a beautiful violin varnish that will last centuries

This is a traditional recipe oil varnish, the likes of which will have been used by the great violin makers of Cremona such as the Amati, Stradivari and Guarneri families. Speaking to experts about the subject, it is unlikely that the families made varnish in its raw form themselves as it was an incredibly dangerous job. Resins and oils had to be cooked at very high, consistent temperatures over open fires. It was often prohibited within the city walls and left to professionals. Cremona, a big producer of linen, would have been the perfect place to produce fine oil varnishes.
What we aim to make here is a beautiful, pure varnish that is highly transparent and can add a deep rich colour to the instrument, enhancing the wood and protecting it too. The colour can vary depending on the number of layers applied from gold to a rich red. No pigments will be added to the varnish, the colour occurs from the natural cooking process.
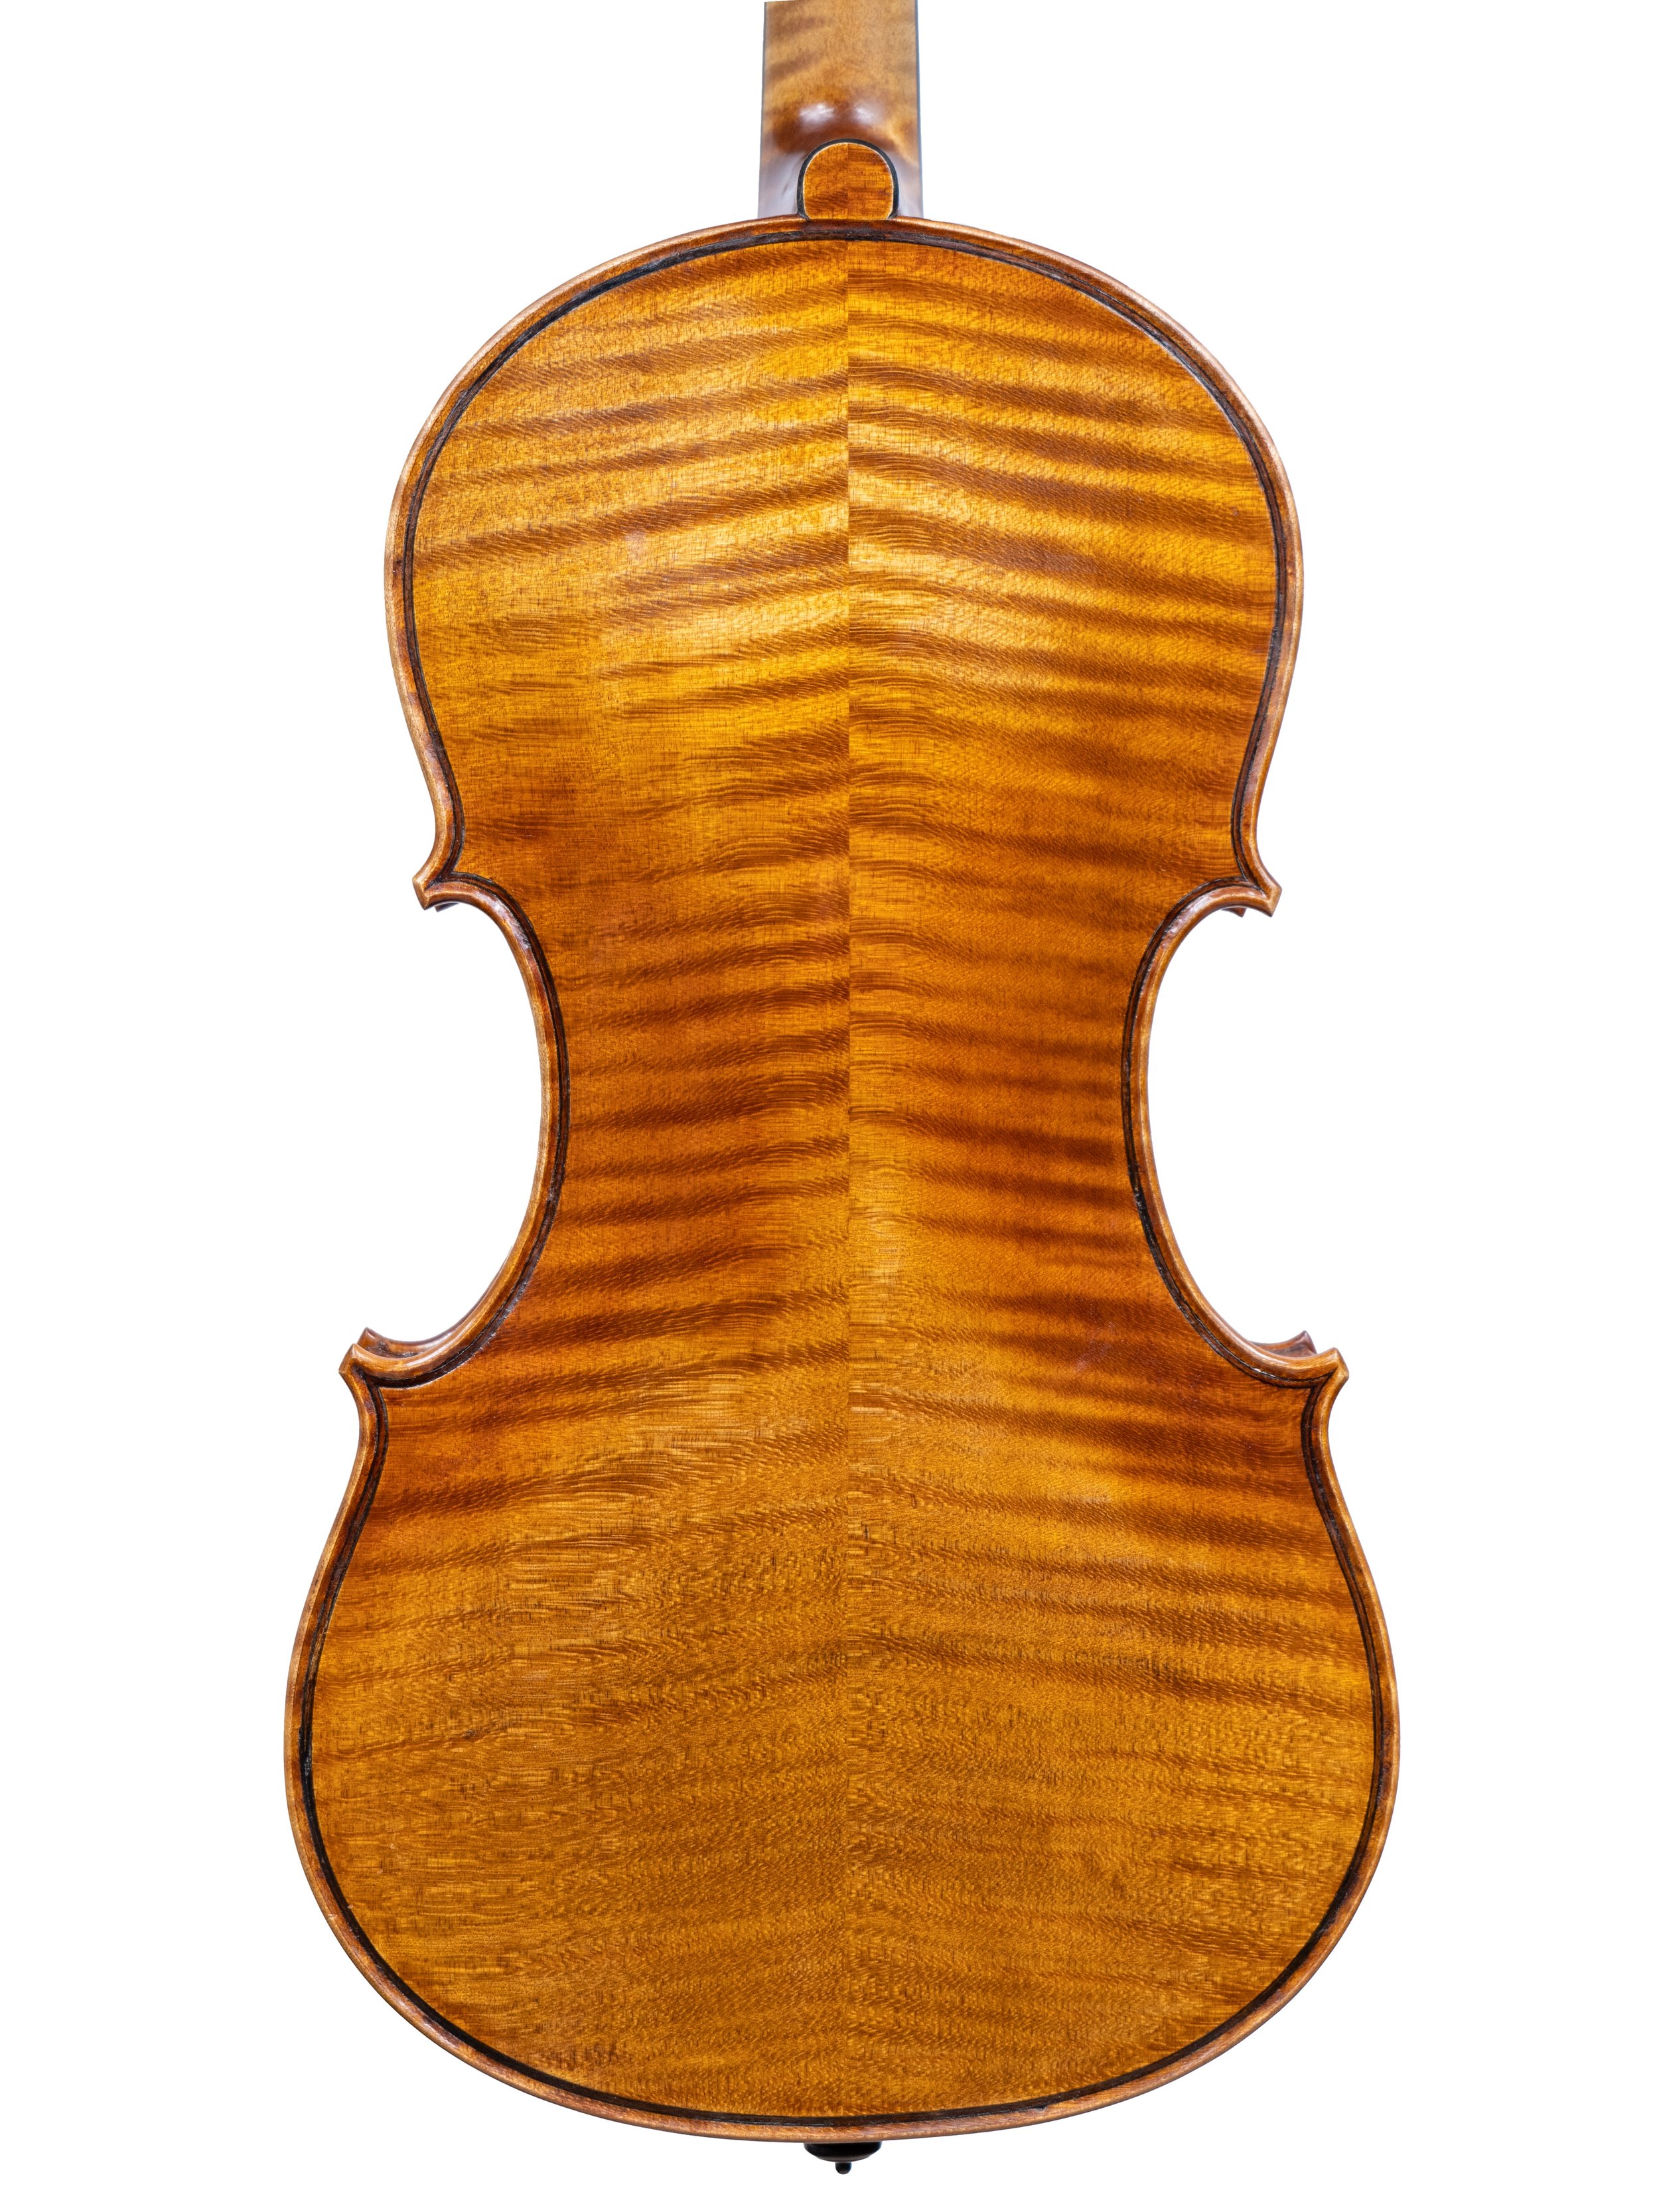
Violin “The Horsley” showing the variation in colour of the oil varnish through the layers
We will be making “colour” varnish from the resins. The recipe for making “clear” varnish is in fact exactly the same, the only difference being the cooking time that produces the colour.
If you would like to make a fine clear varnish, simply cook the resins for two hours before mixing the oil in. The colour varnish will cook for 7 days, 168 hours, consistently.
There are a few aims that in mind when creating a varnish suitable for an instrument, it has to:
Protect the wood of the instrument below
Be as transparent as possible
Have a beautiful, rich colour
Enhance the sound of the instrument

Varnish Recipe:
47.5% colophony
47.5% refined linseed oil
5% gum mastic
+
Rectified turpentine to thin to desired amount
1-2% siccative
Equipment:
6” pan
Electric cooking hob
Weighing scales
Digital thermometer
Extraction fan
Varnish filter cone, 200 mesh
Varnish tins
A 500g bag of colophony is put into the pan.
Colophony is an excellent resin to use as it has a relatively low melting point. It is the same resin used on the hair of a bow, which starts melting simply with the friction created from the bow. Other resins can be used for different colours, they will have their own melting points. Some, like copal, are extremely high and very dangerous to cook.
It is important to weigh everything as we go along to be sure of the ratios. This includes weighing the pan itself. We will weigh what is left over to see what percentage has been lost during the cooking and to add the same amount of oil to keep the desired ratios.

Bring the temperature up to 350F (176C) slowly, checking with a thermometer. It is important to raise it slowly as the reaction will be greatest at the beginning of the process. It will settle as all of the resin combines.


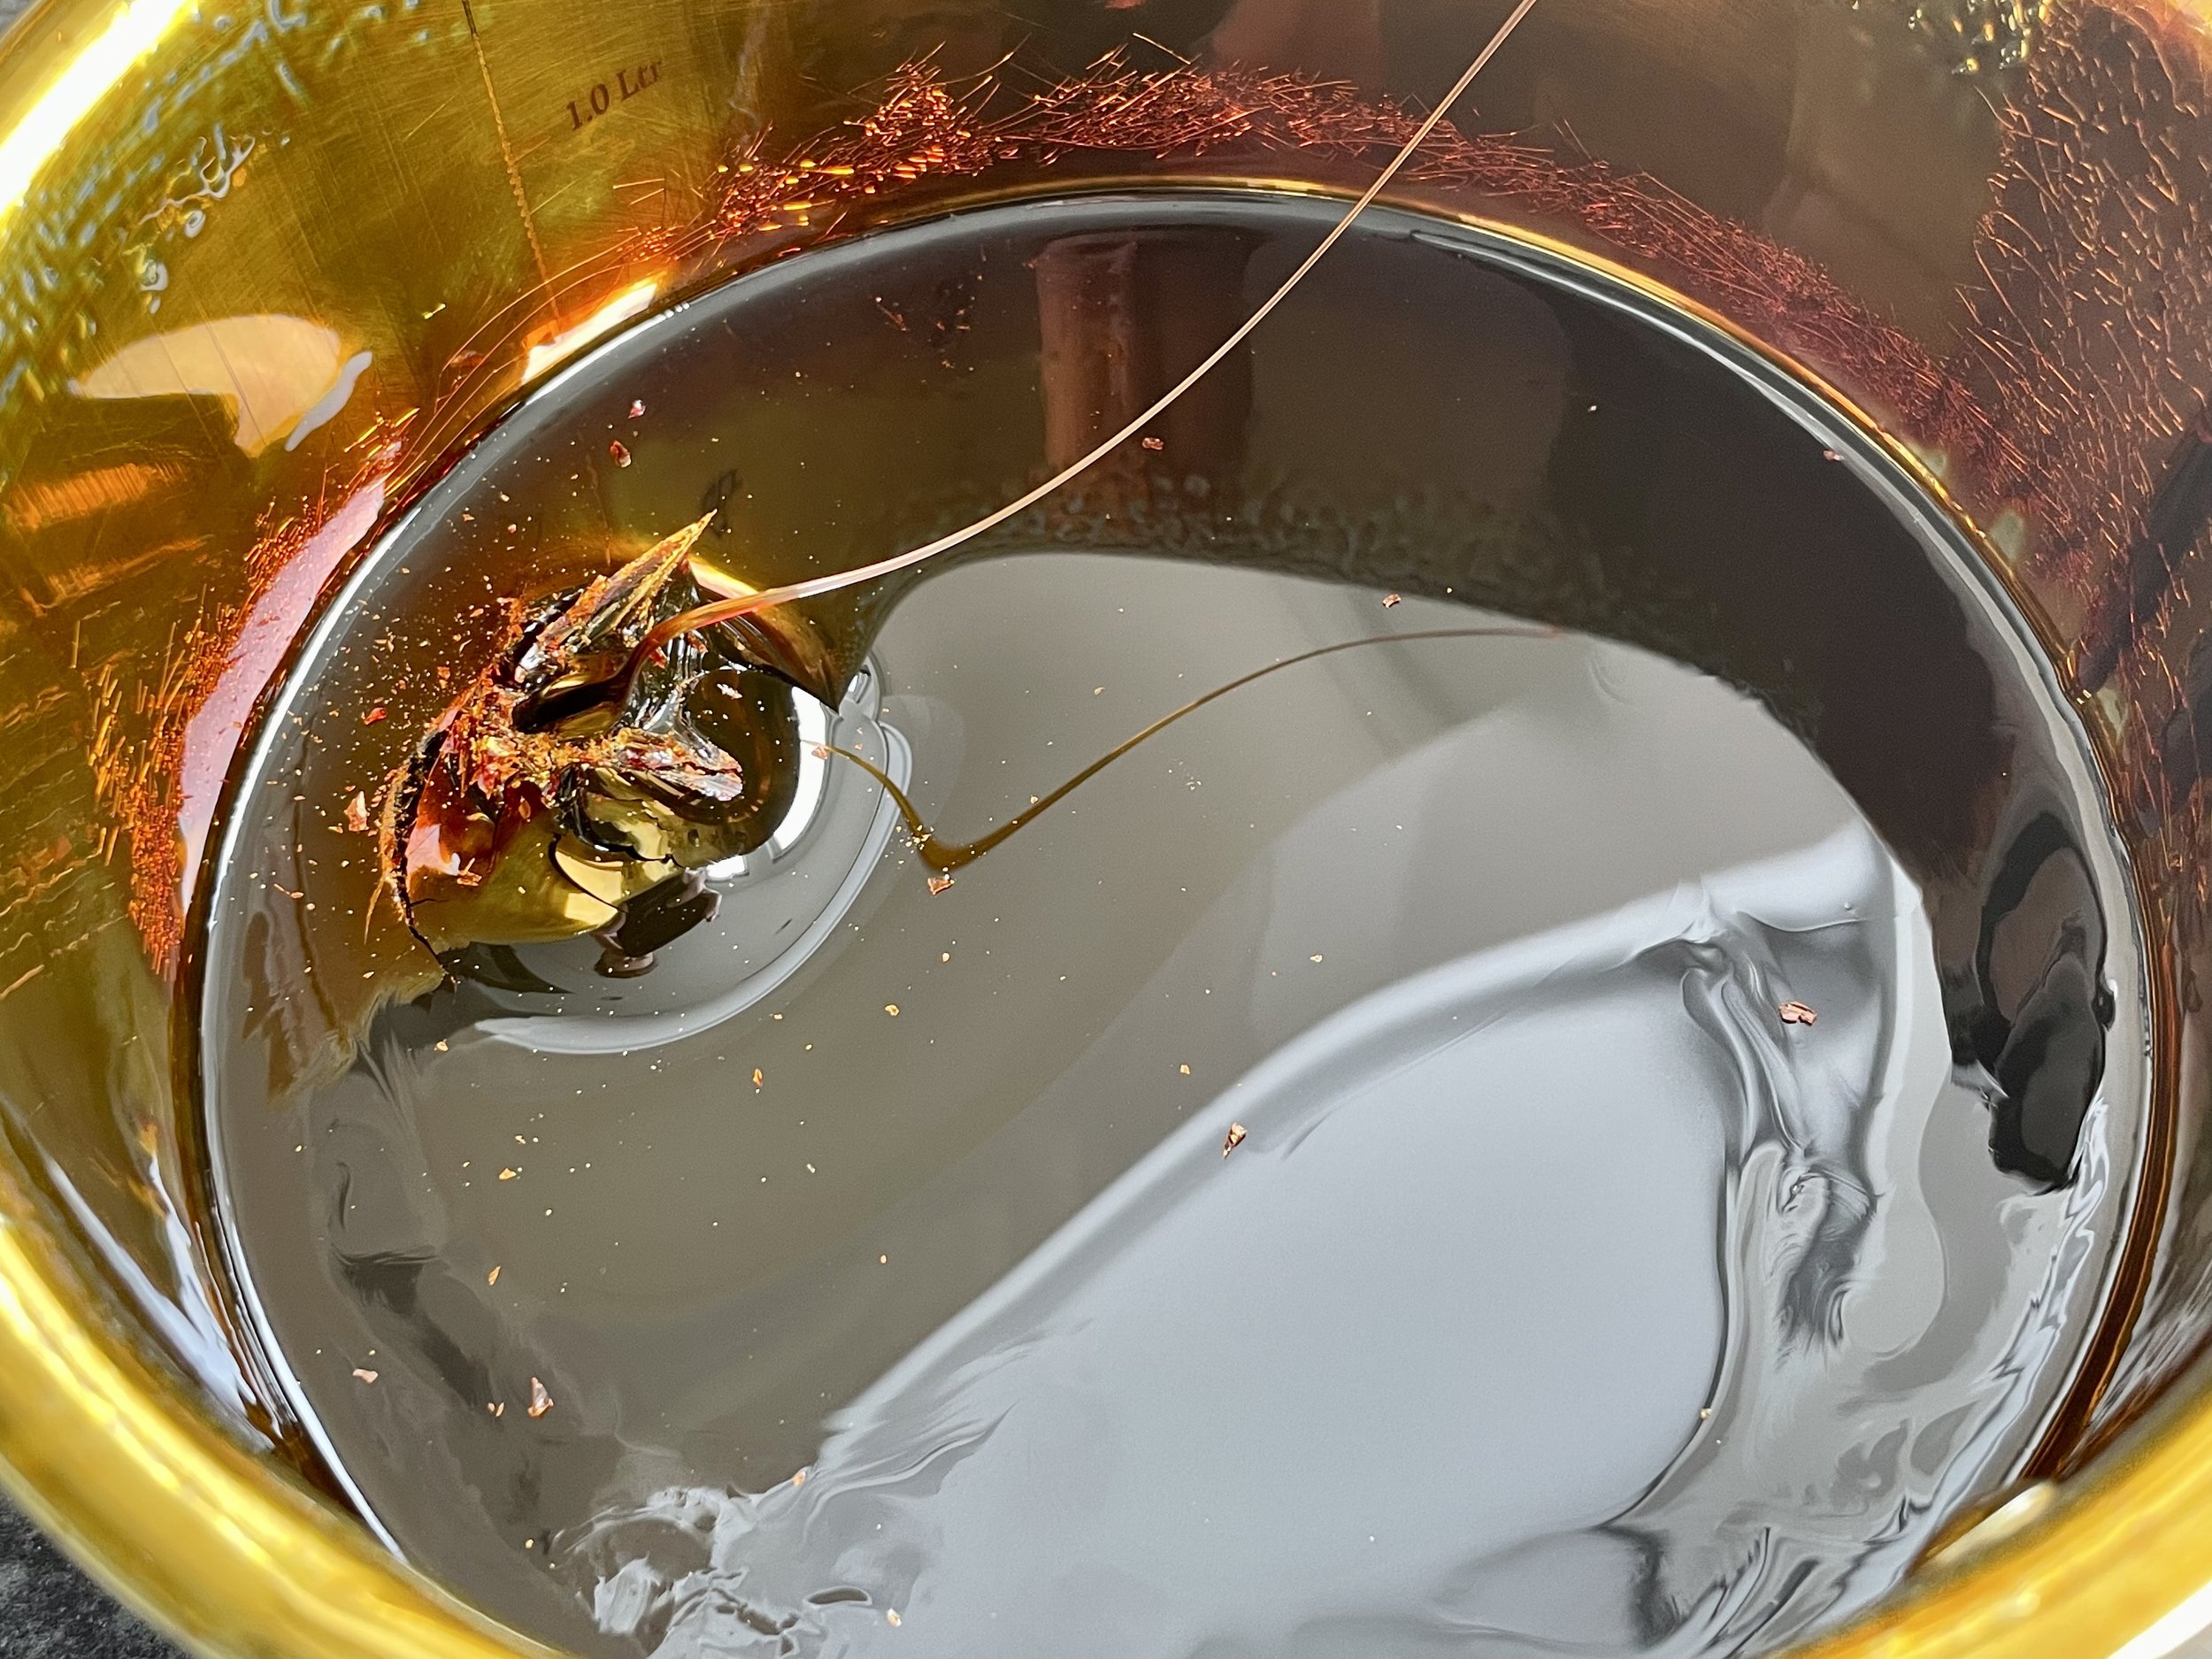
The colophony is left to cook constantly for one week, 168 hours, at 350F (176C)
The temperature is checked regularly. It will vary at night time and as the amount of colophony reduces in the pan. As the days pass, the colour will deepen, the molecular structure of the colophony being altered slowly.

Using a piece of violin maple, we can see how the colour develops over time by keeping a record.

After a full week’s cooking, the heat is turned off and the resin left to cool to room temperature, solidifying as it cools.
Preparing the Linseed Oil
We will be using artist quality cold pressed linseed oil. Before mixing it with the resins, we will need to prepare it by washing and boiling it to make it as pure and transparent as possible, whilst keeping some colour.
Taking a 500ml bottle, the linseed oil is poured into a container with water. The two are shaken by hand to mix them, before allowing them to separate naturally.
Although this picture is of the mixture in a blender, it was not blended electronically. Using an electric mixer will emulsify the oil which is not desired.


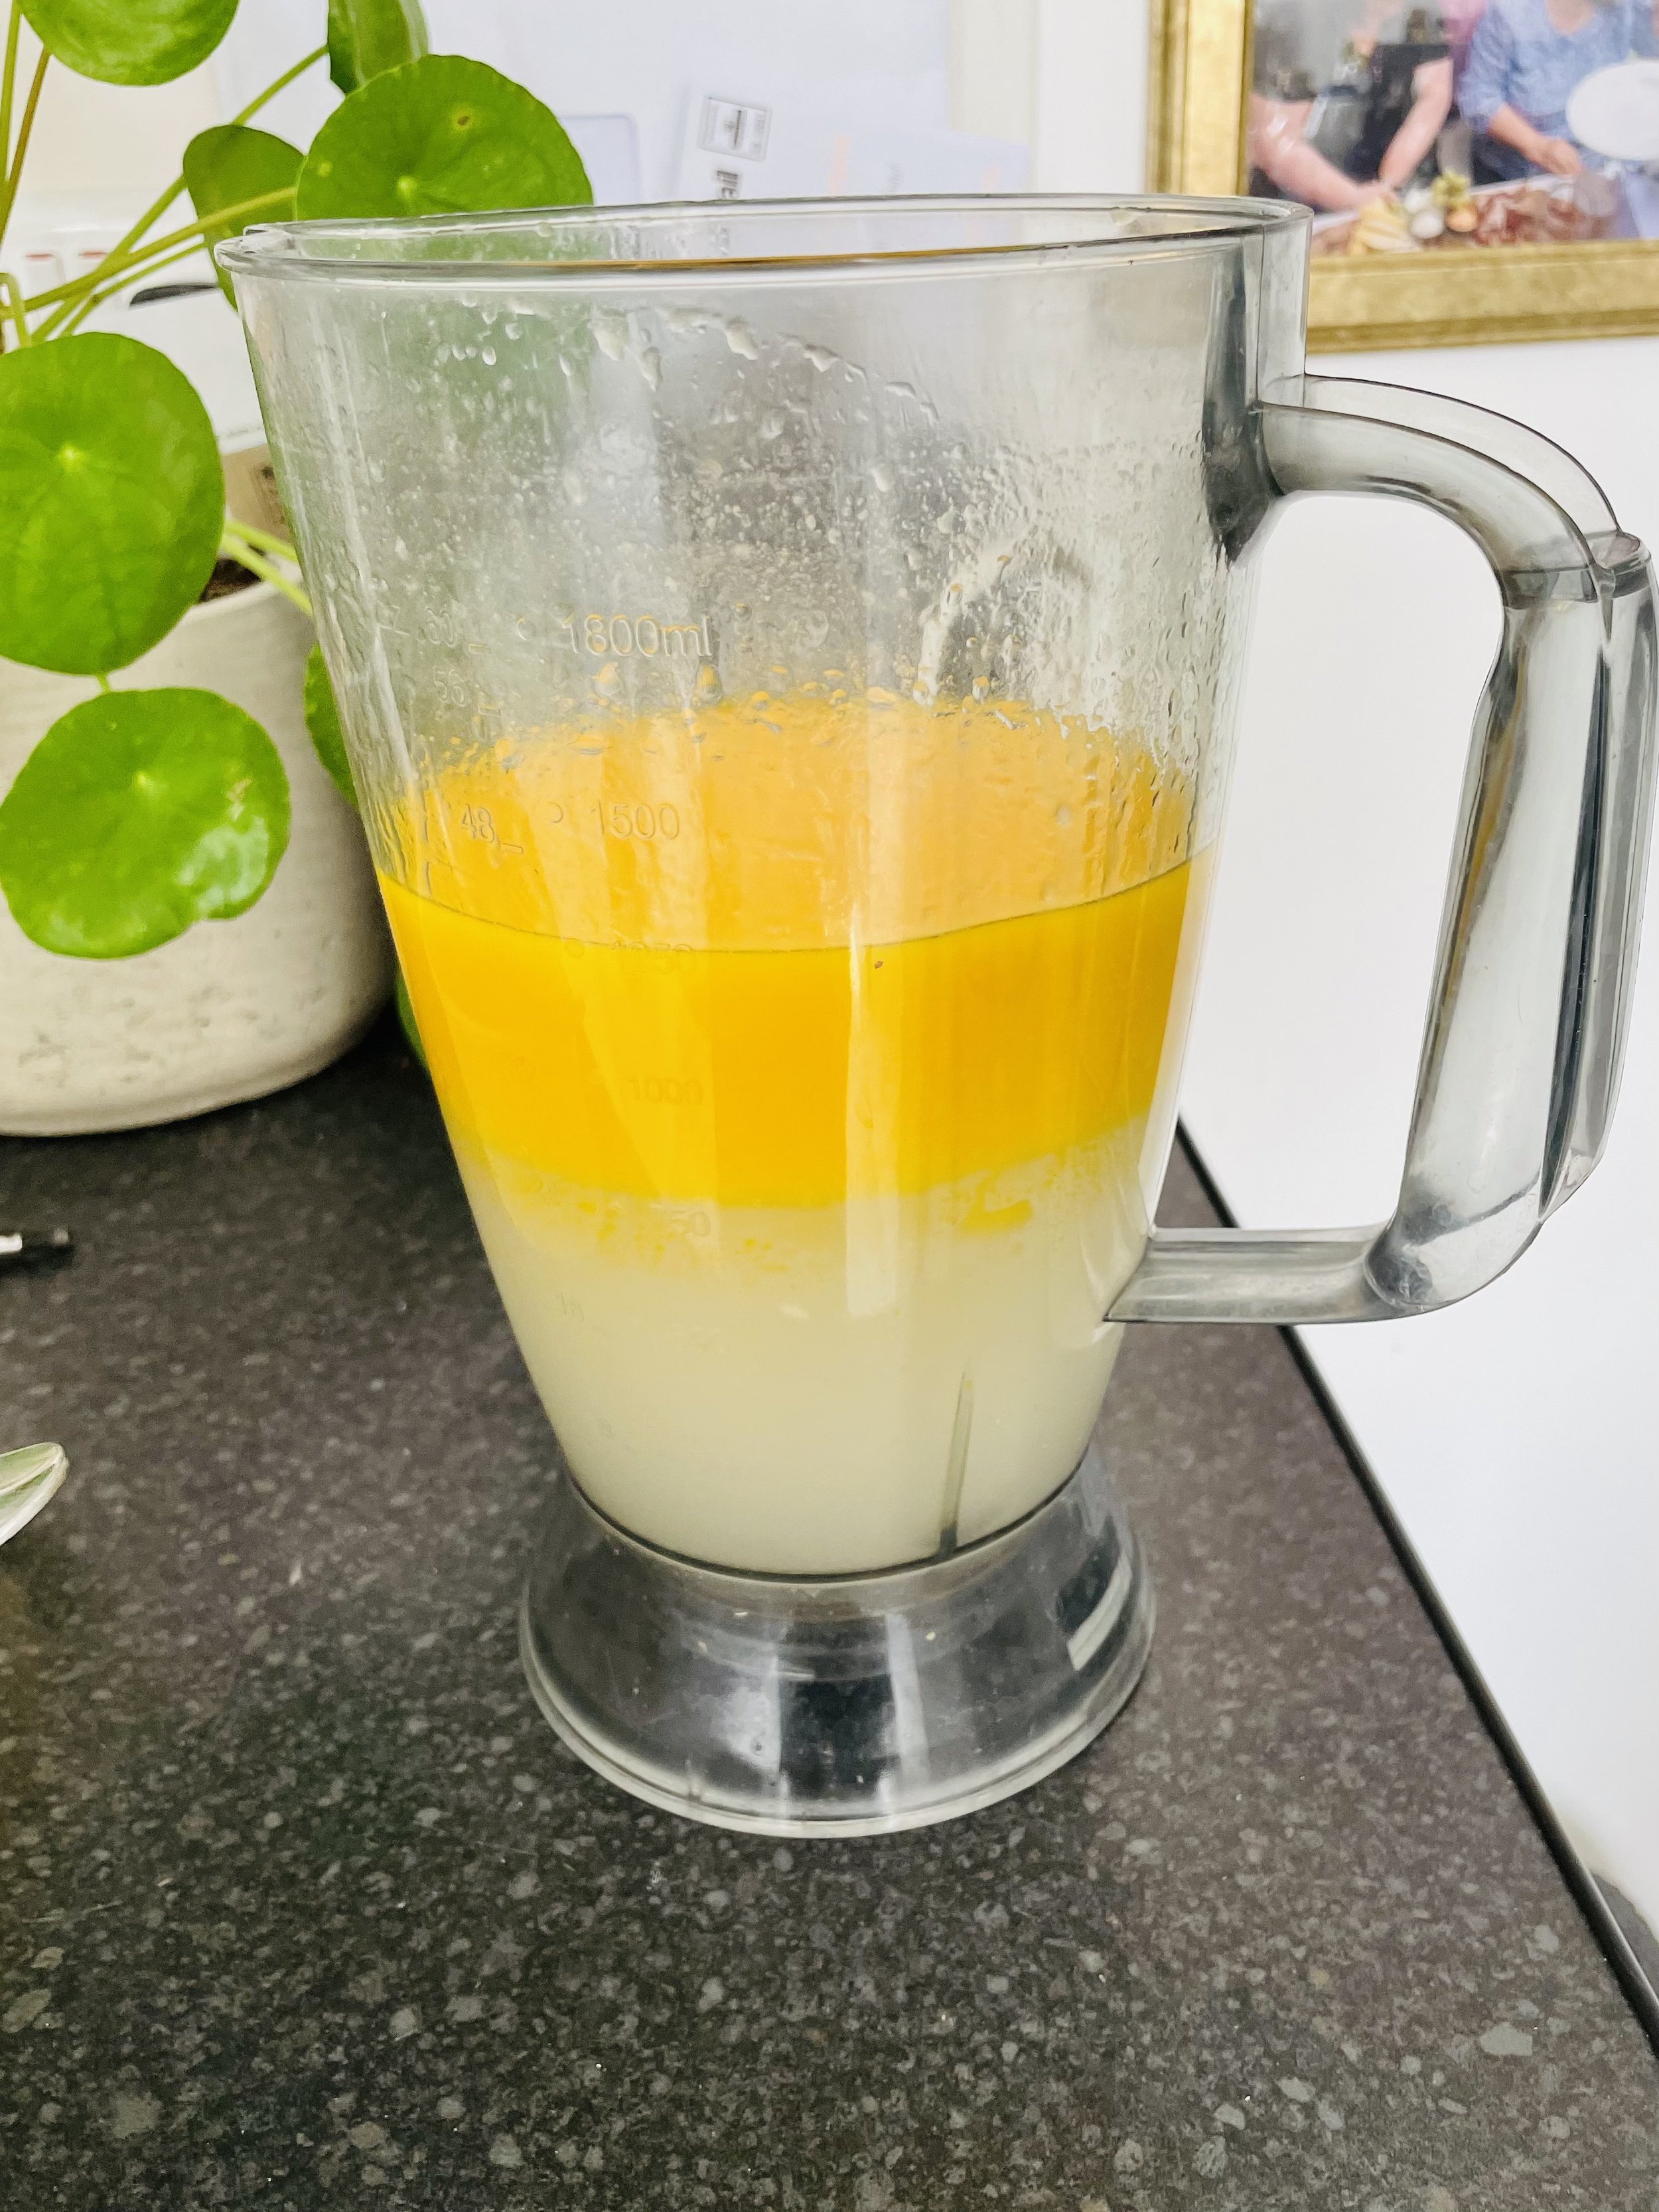
The oil will naturally go to the top, with the water below. The oil is then taken off the top using a ladle. This process is repeated 3 times, the water “cleaning” the oil each time, purifying it and making it more transparent. Over washing is not desired as we want some colour and character in the oil.

The washed oil is then boiled at 250F (121C) for two hours to remove all the water and further purify the oil. This is a very dangerous part of the process as the mixture will bubble and splutter out of the pan if open, a cover guard or splash guard is highly recommended.

After two hours the heat is turned off and the purified oil allowed to cool completely. What we are left with is a fine washed, boiled and highly transparent linseed oil ready to be mixed with the resins.
Mixing the oil and resins
We will now check the final weight of the resin and add the same amount of oil in a 50/50 mix. The total weight of the colophony after cooking is 9oz (255ml) and so we will weigh out 9oz of the refined oil to mix with it.
Any remaining oil is of a very high quality and can be used in the workshop for other jobs. This oil is used to finish violin, viola and cello bridges in the Ruschil workshop as it so transparent, enhancing the character of the bridge maple, protecting it, without colouring it.


We will then add 5% gum mastic to the total weight of the resin & oil mixture. In this case, 18oz of resin & oil requires 0.9oz of gum mastic.
Mastic (Greek: Μαστίχα) is a plant that grows on the island of Chios (Χίος). Mastic “tears” have been used in varnishes as well as cooking and religious ceremonies since ancient times. The Ancient Egyptians used it for embalming. The purpose of this in the varnish is to improve the drying time whilst adding a beautiful waxy sheen. The soft mastic tears must be added at a very low temperature to prevent them from burning.


The measured out gum mastic tears are added to the cooked colophony at room temperature.

The final mixture of colophony, mastic and oil is cooked together for two hours at 350F (176C), slowly raising the temperature and stirring as they blend.
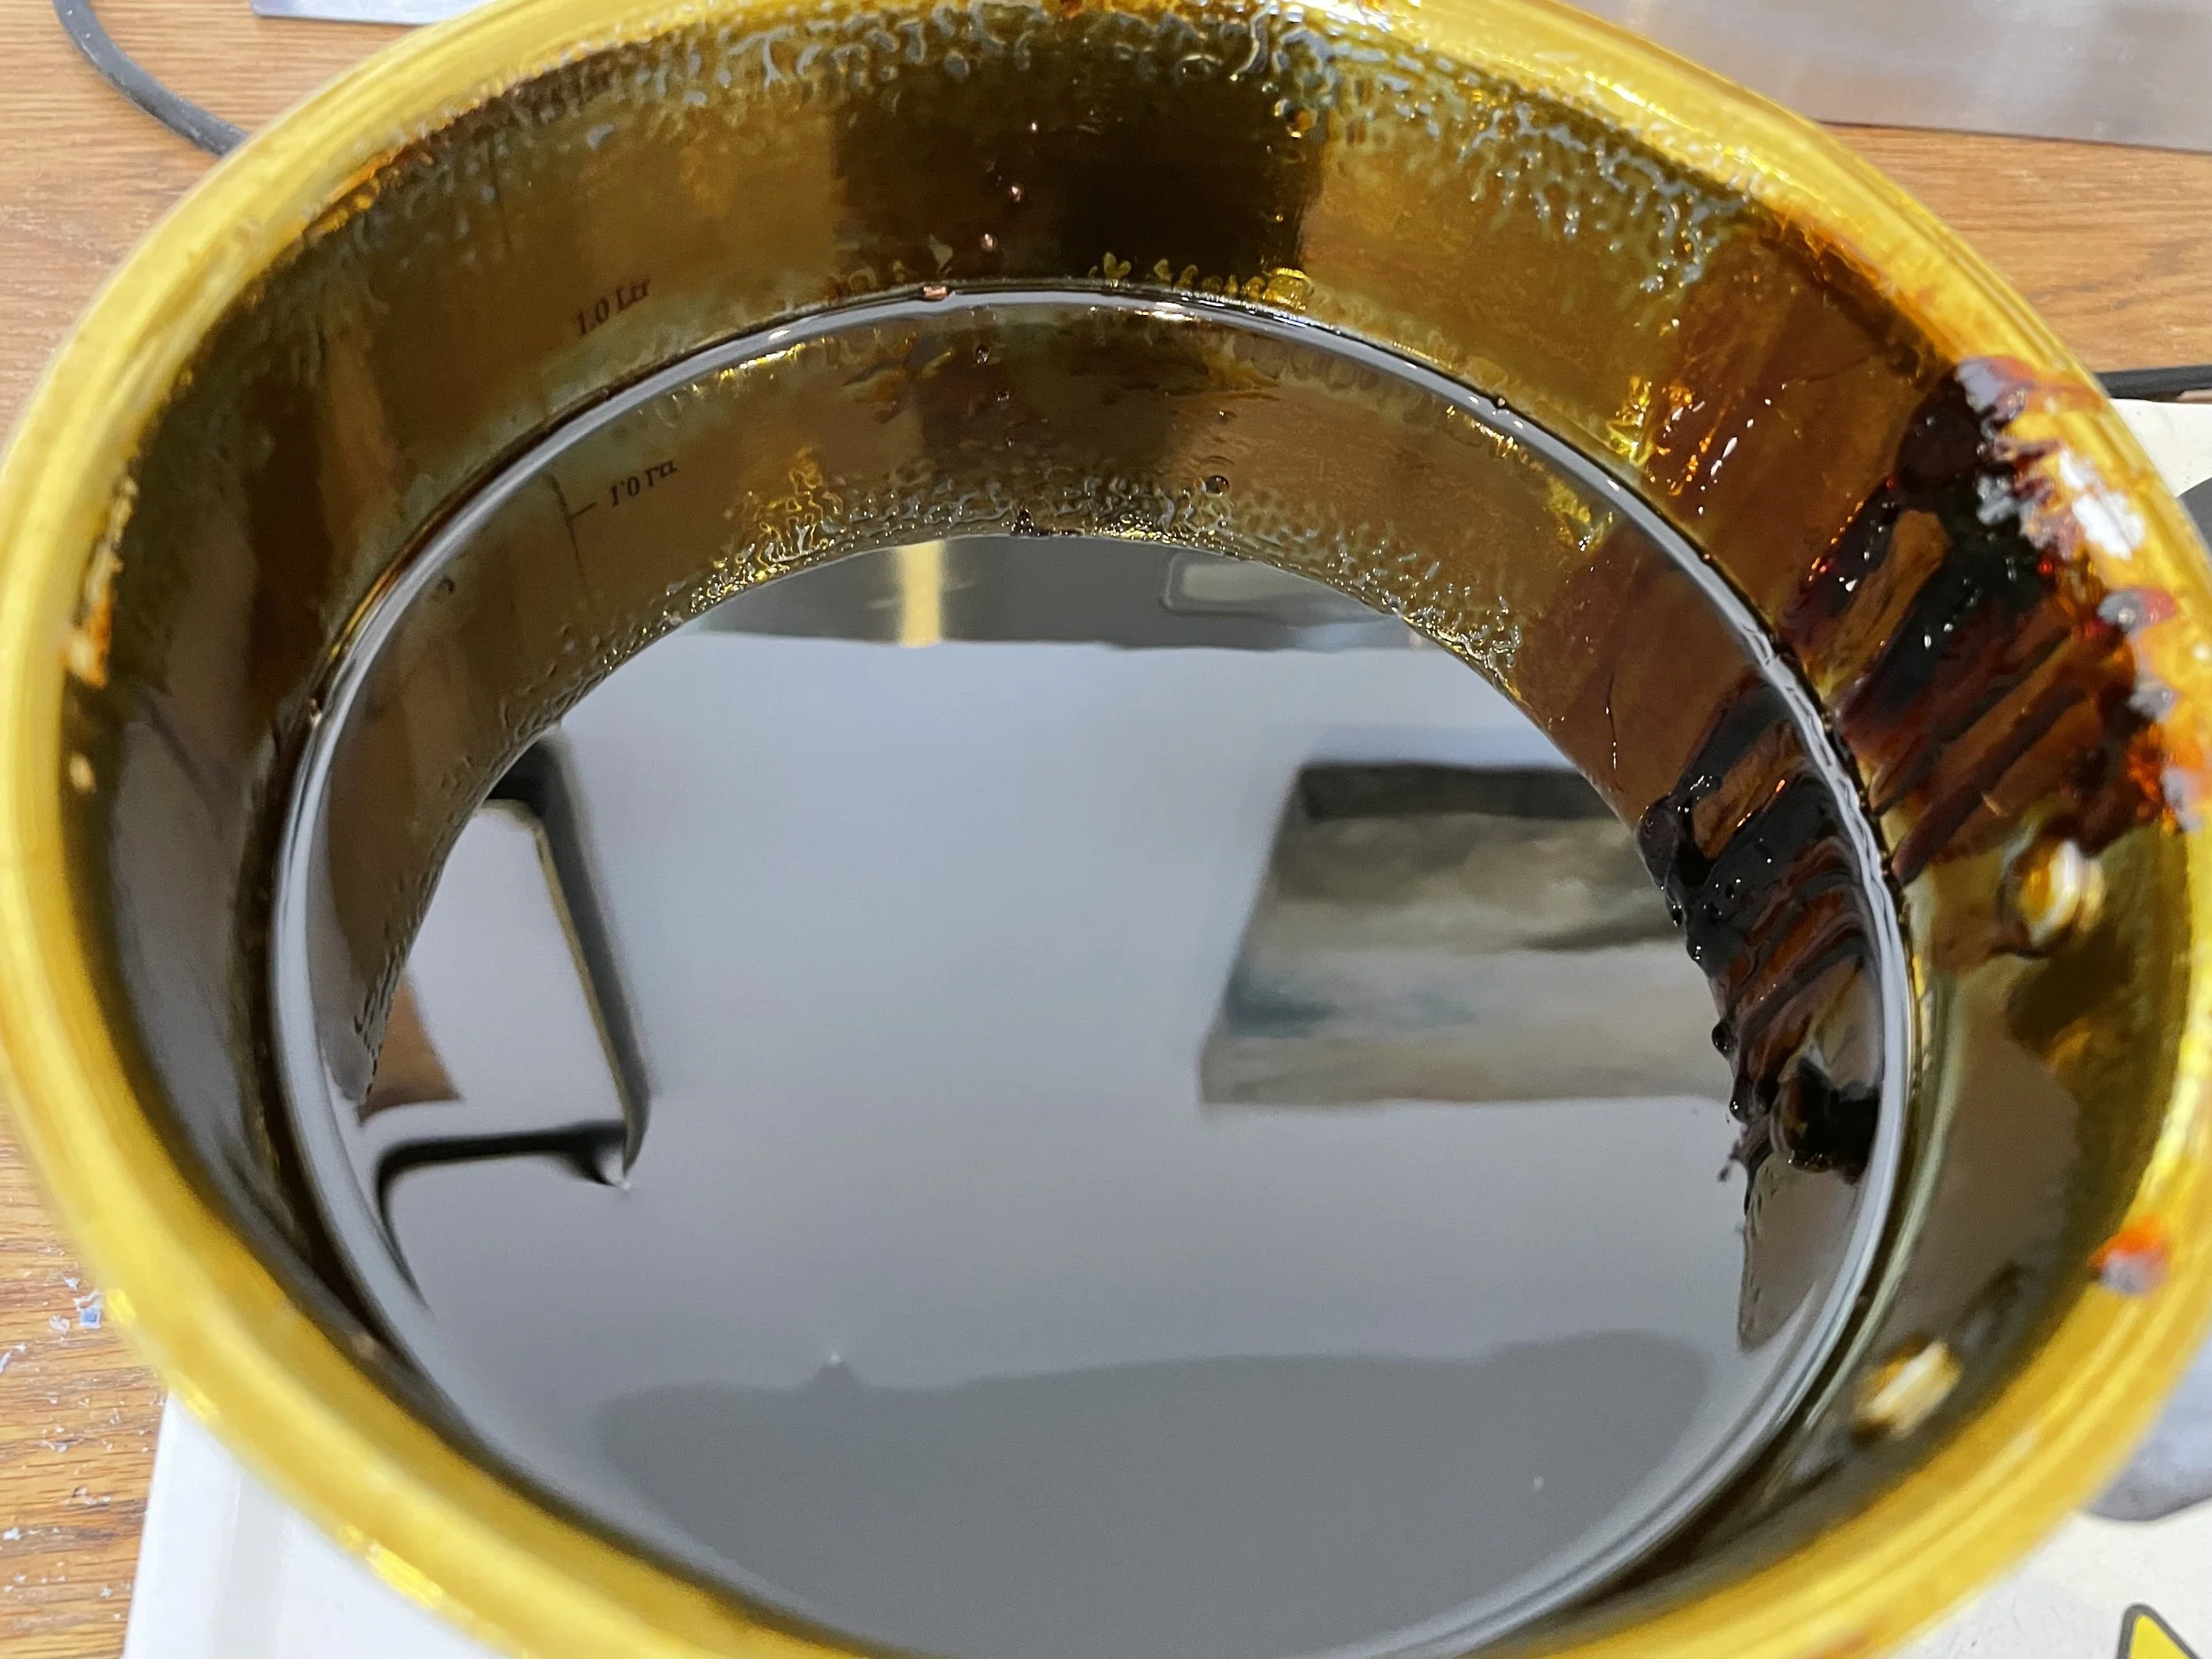
After two hours, whilst still hot, the mixture is poured through a funnel with a 200 mesh varnish filter into air tight tins


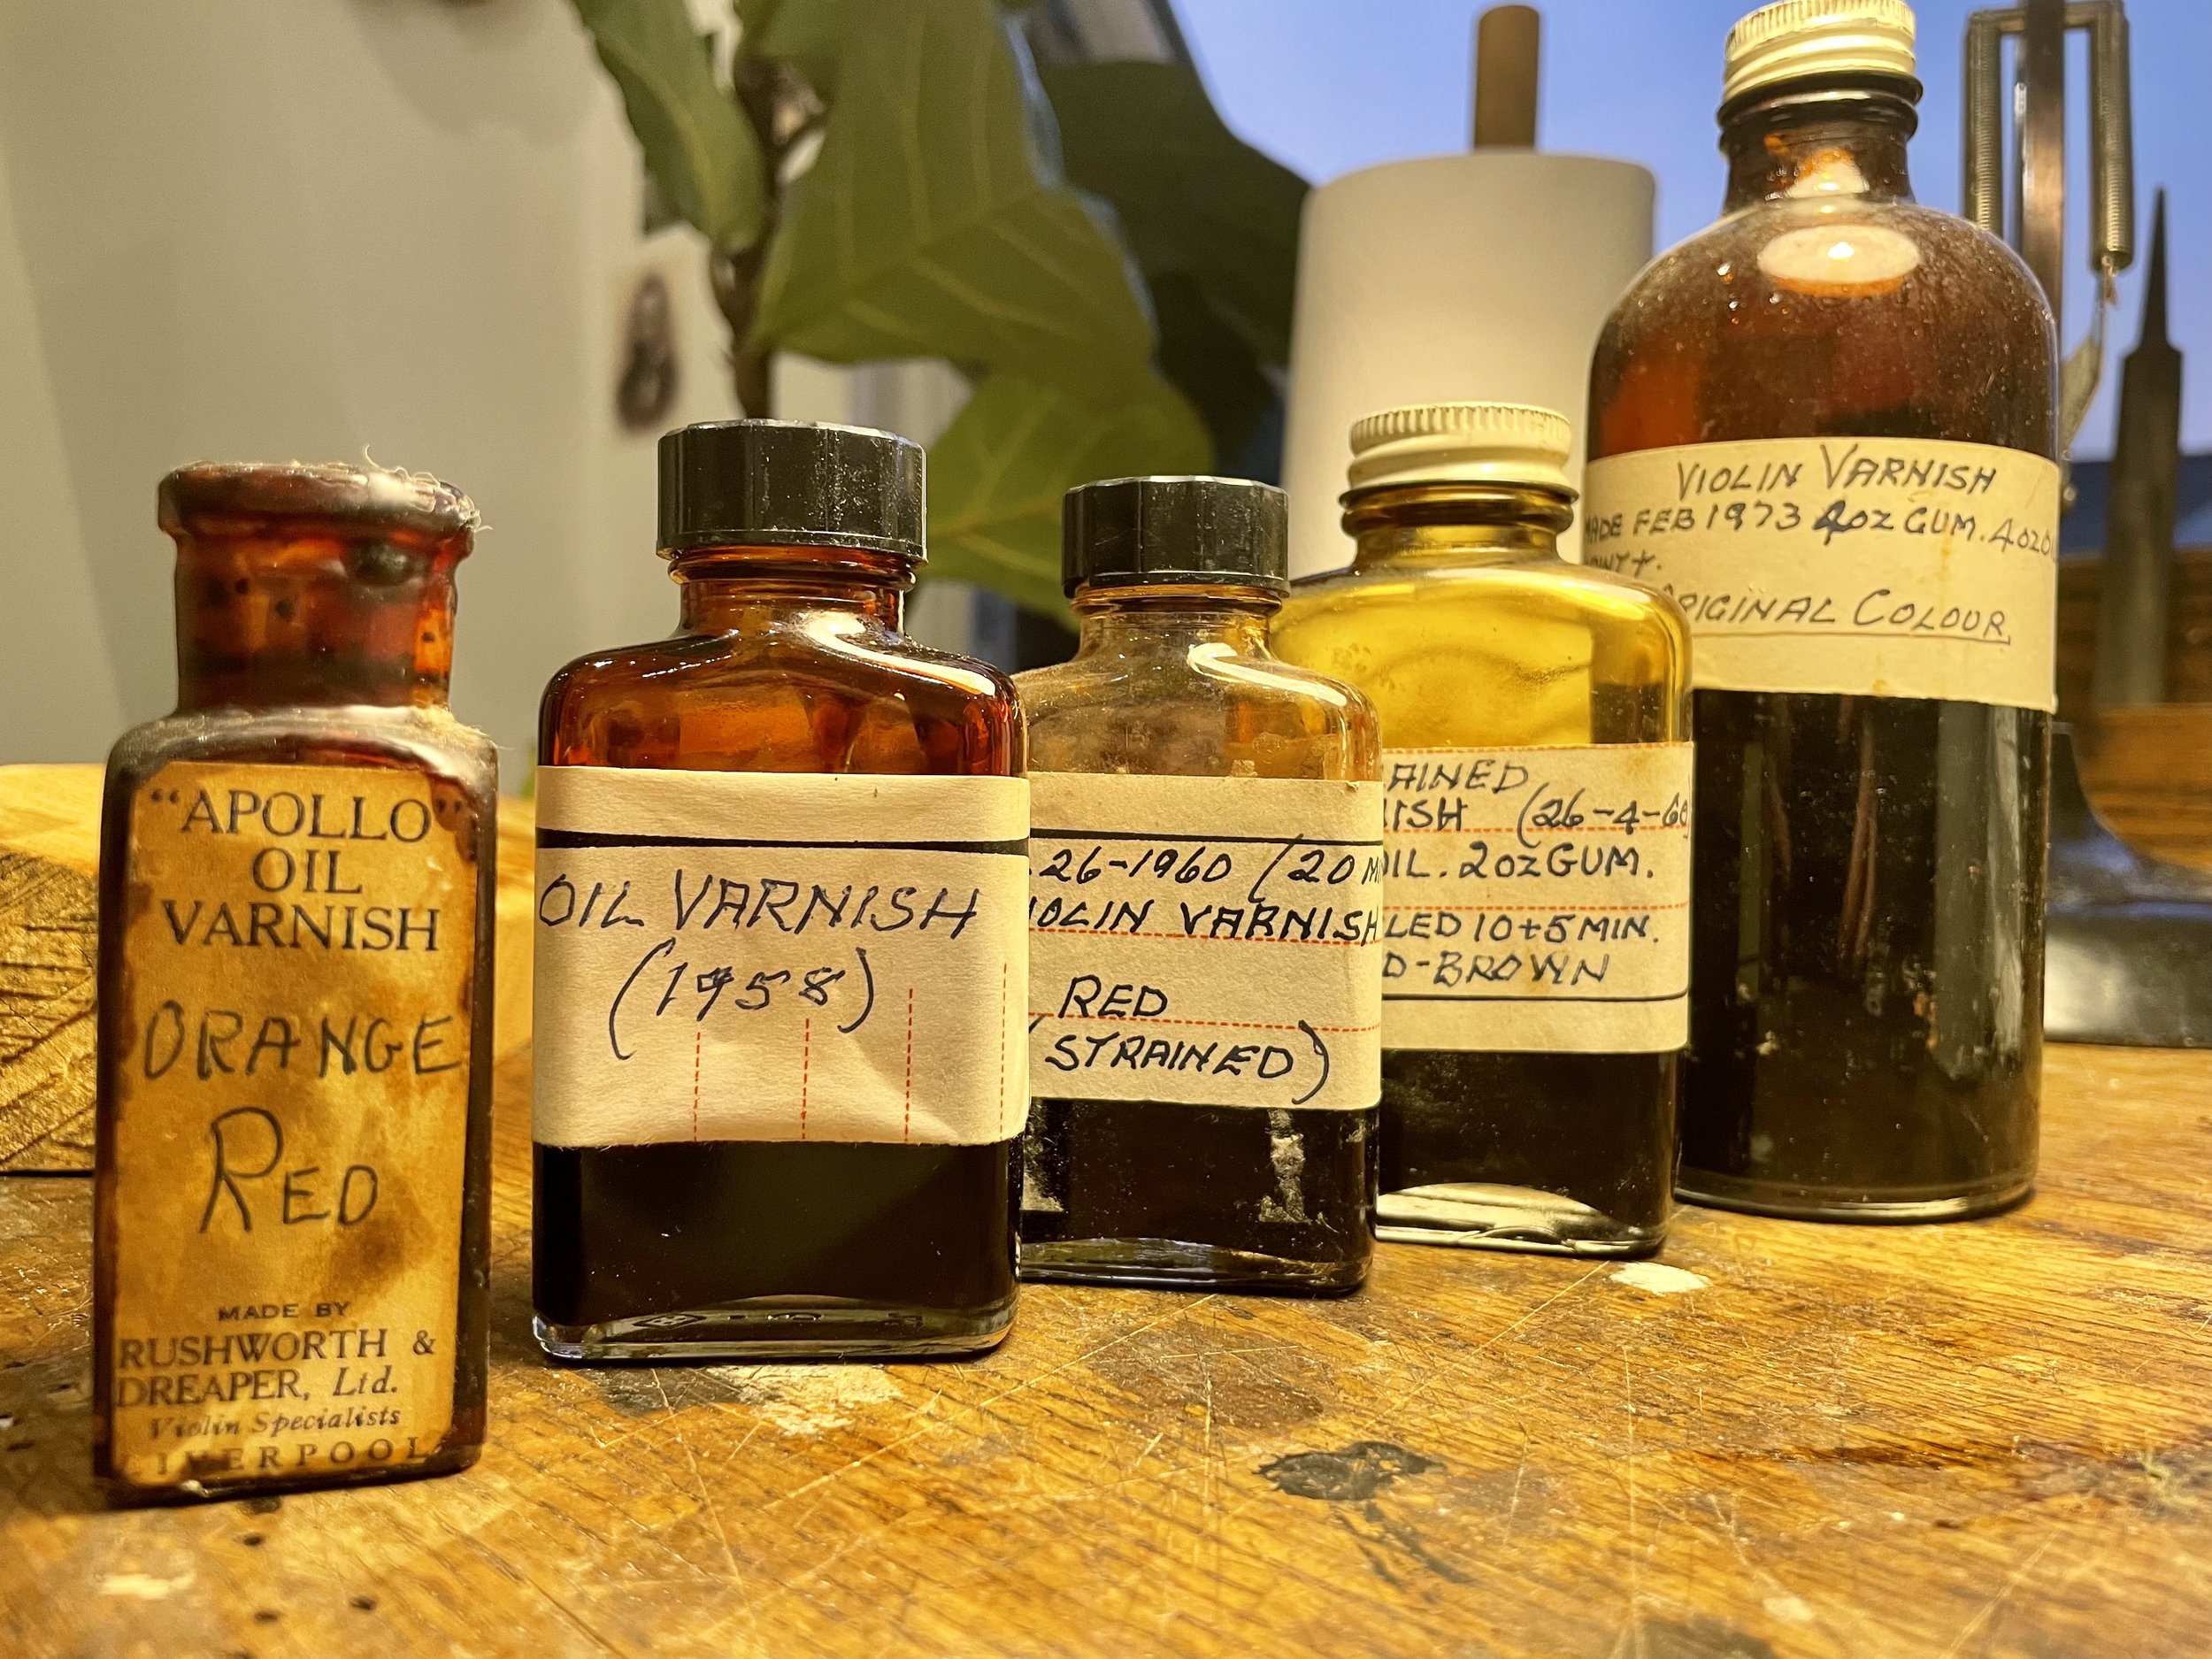
After allowing to cool, the mixture is ready to be used. The three tins in the picture above will provide enough varnish for around 24 violins, depending on how thick and which colour of varnish is desired and if stored properly can last many years. Below is a collection of vintage varnishes donated to the Ruschil & Bailly workshop, some of which are still usable 64 years later.
Application
Before applying, some of the original varnish mixture is taken into a new jar where it is diluted with rectified turpentine to the perfect consistency for your brush. 1-2% siccative is added to this new jar, mixing for at least 2 minutes. Siccative will dramatically reduce the drying time, without affecting the nature of the varnish if kept below 2%.


With the perfect consistency achieved, the varnish can be applied to the wood. The best brush for this is a 100% sable flat brush. Made of the very highest quality natural hair, they can last a lifetime if taken care of properly.
After applying to a violin, viola or cello and left for 5 minutes the varnish can be “padded” down if required to blend in any strokes with the fleshy part of the hand or fingers.
The varnish can be dried in UV light, whether in natural sunlight or a UV cupboard and will be touch dry within 6 hours. Allowing 24 hours between coats will let the varnish to dry properly. It is always best to allow as much time as possible for the previous coat to dry, thicker coats will require a longer drying time.
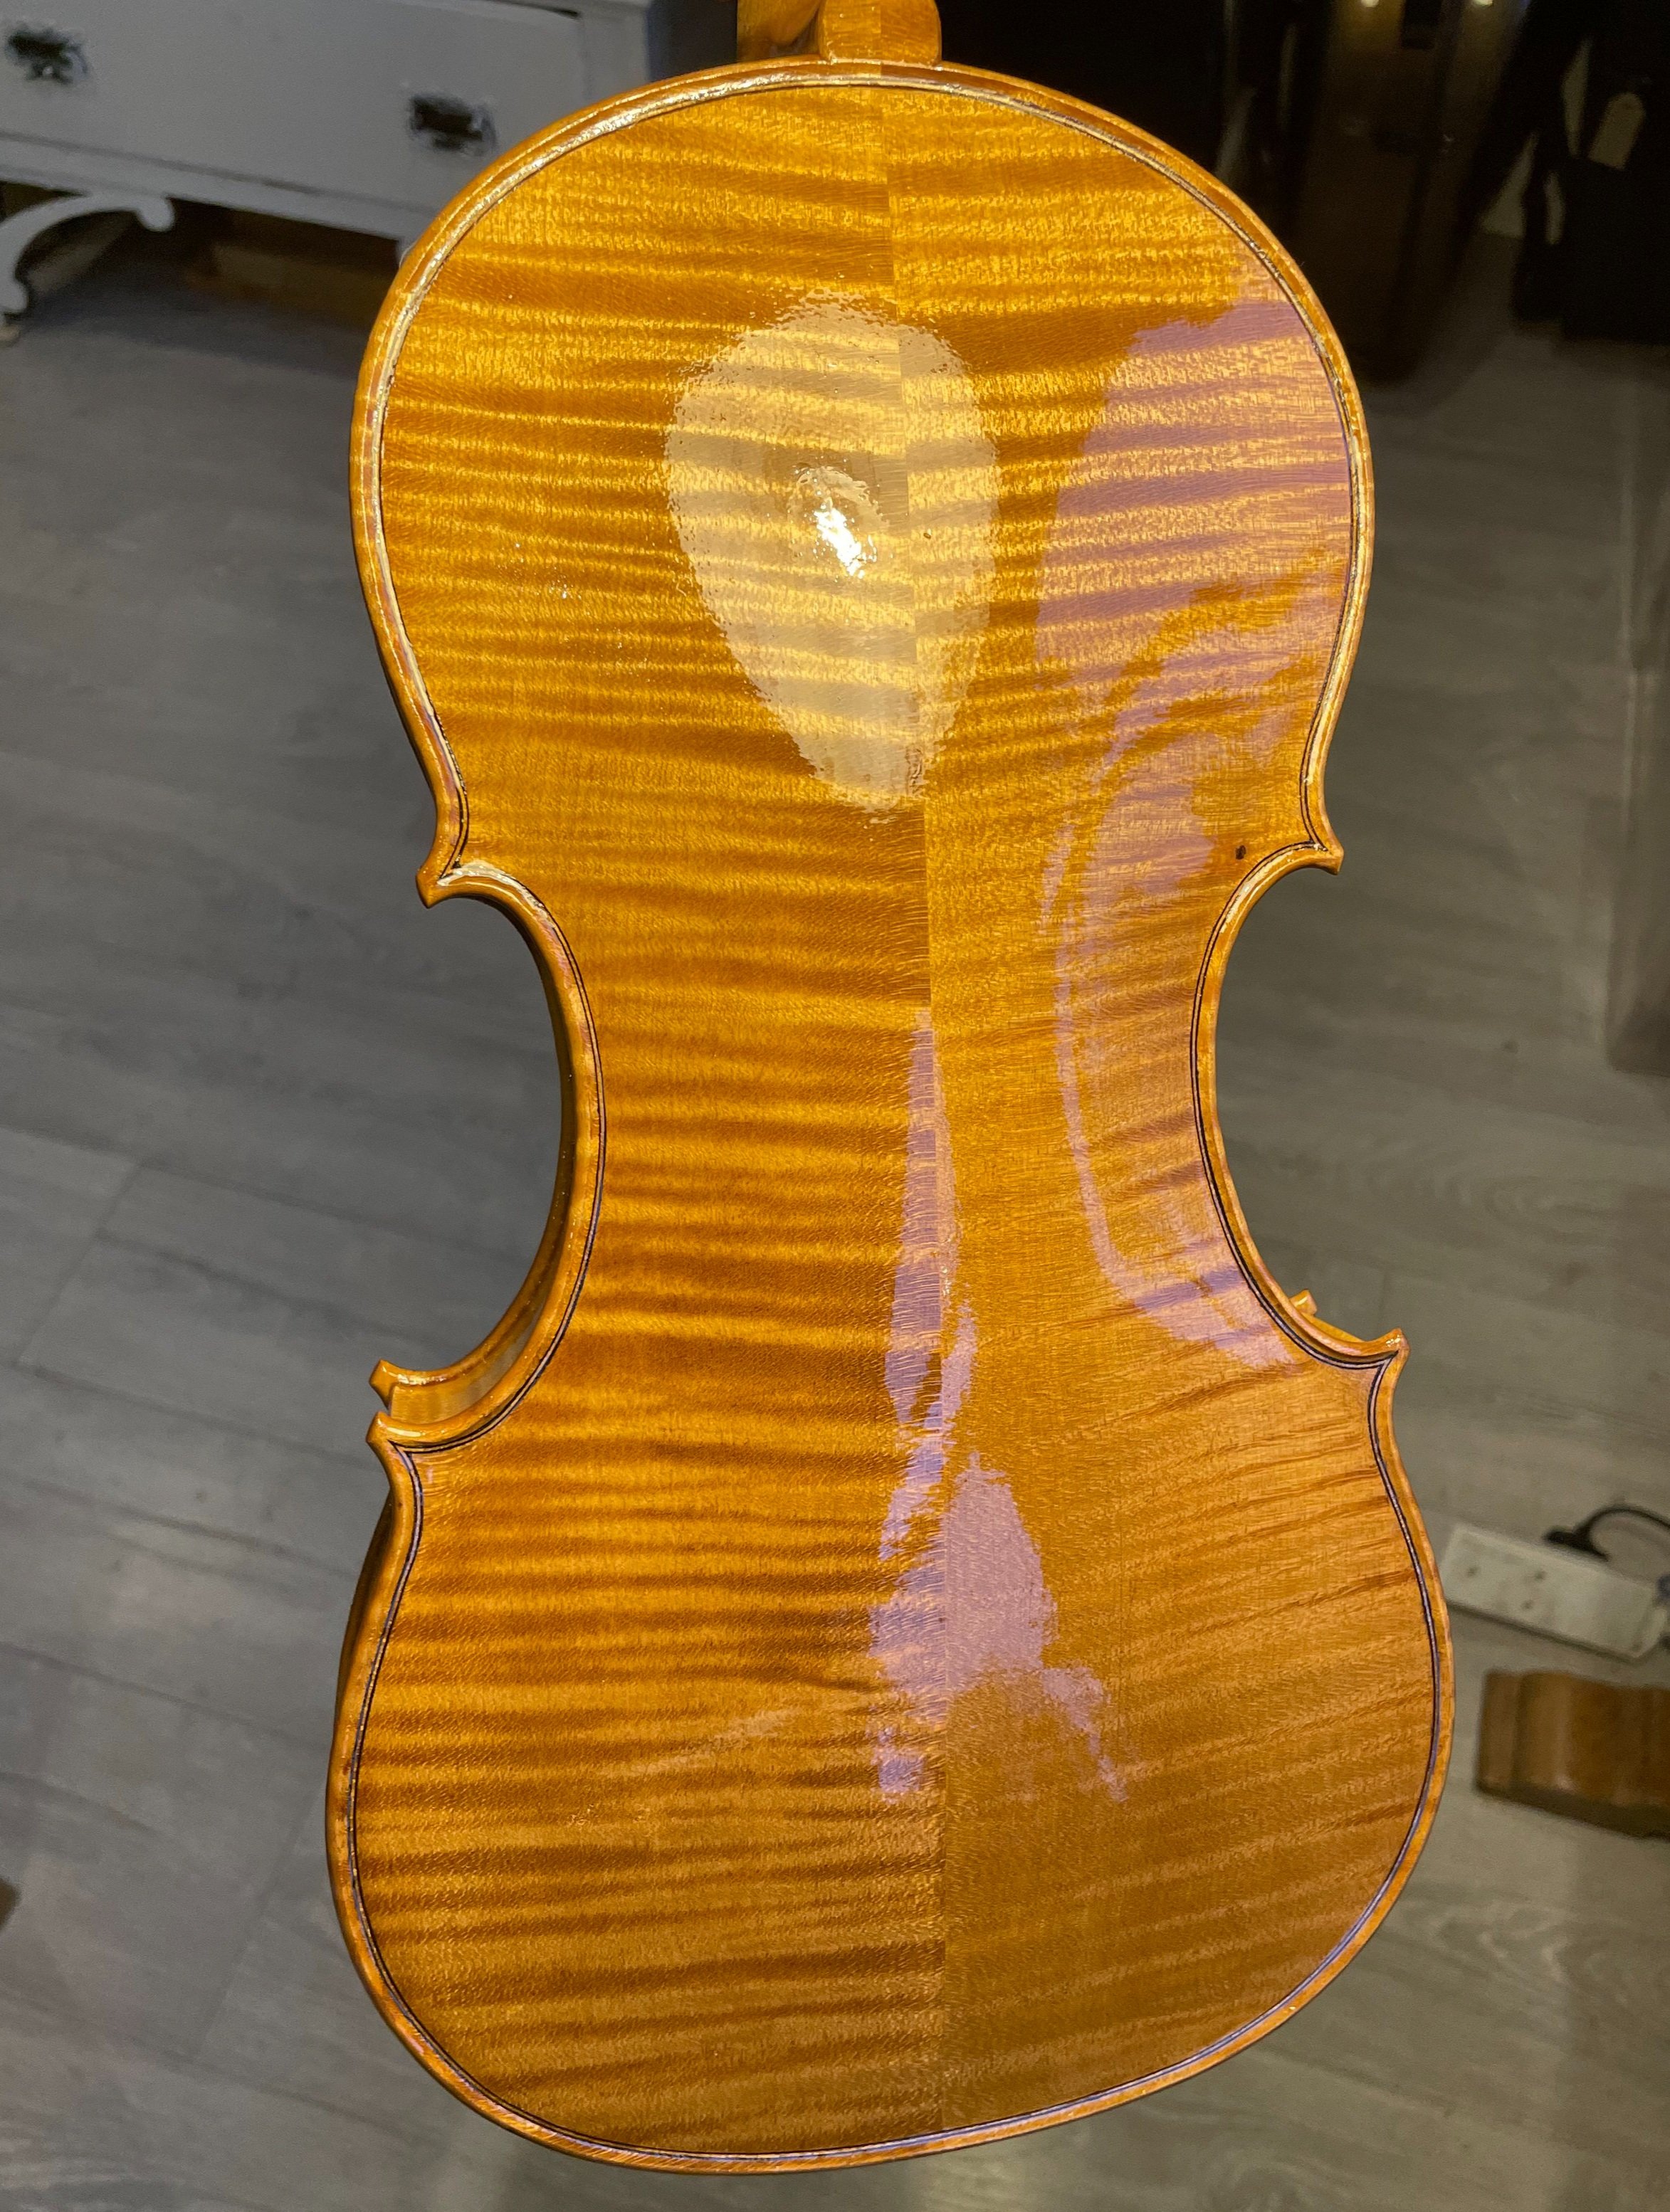

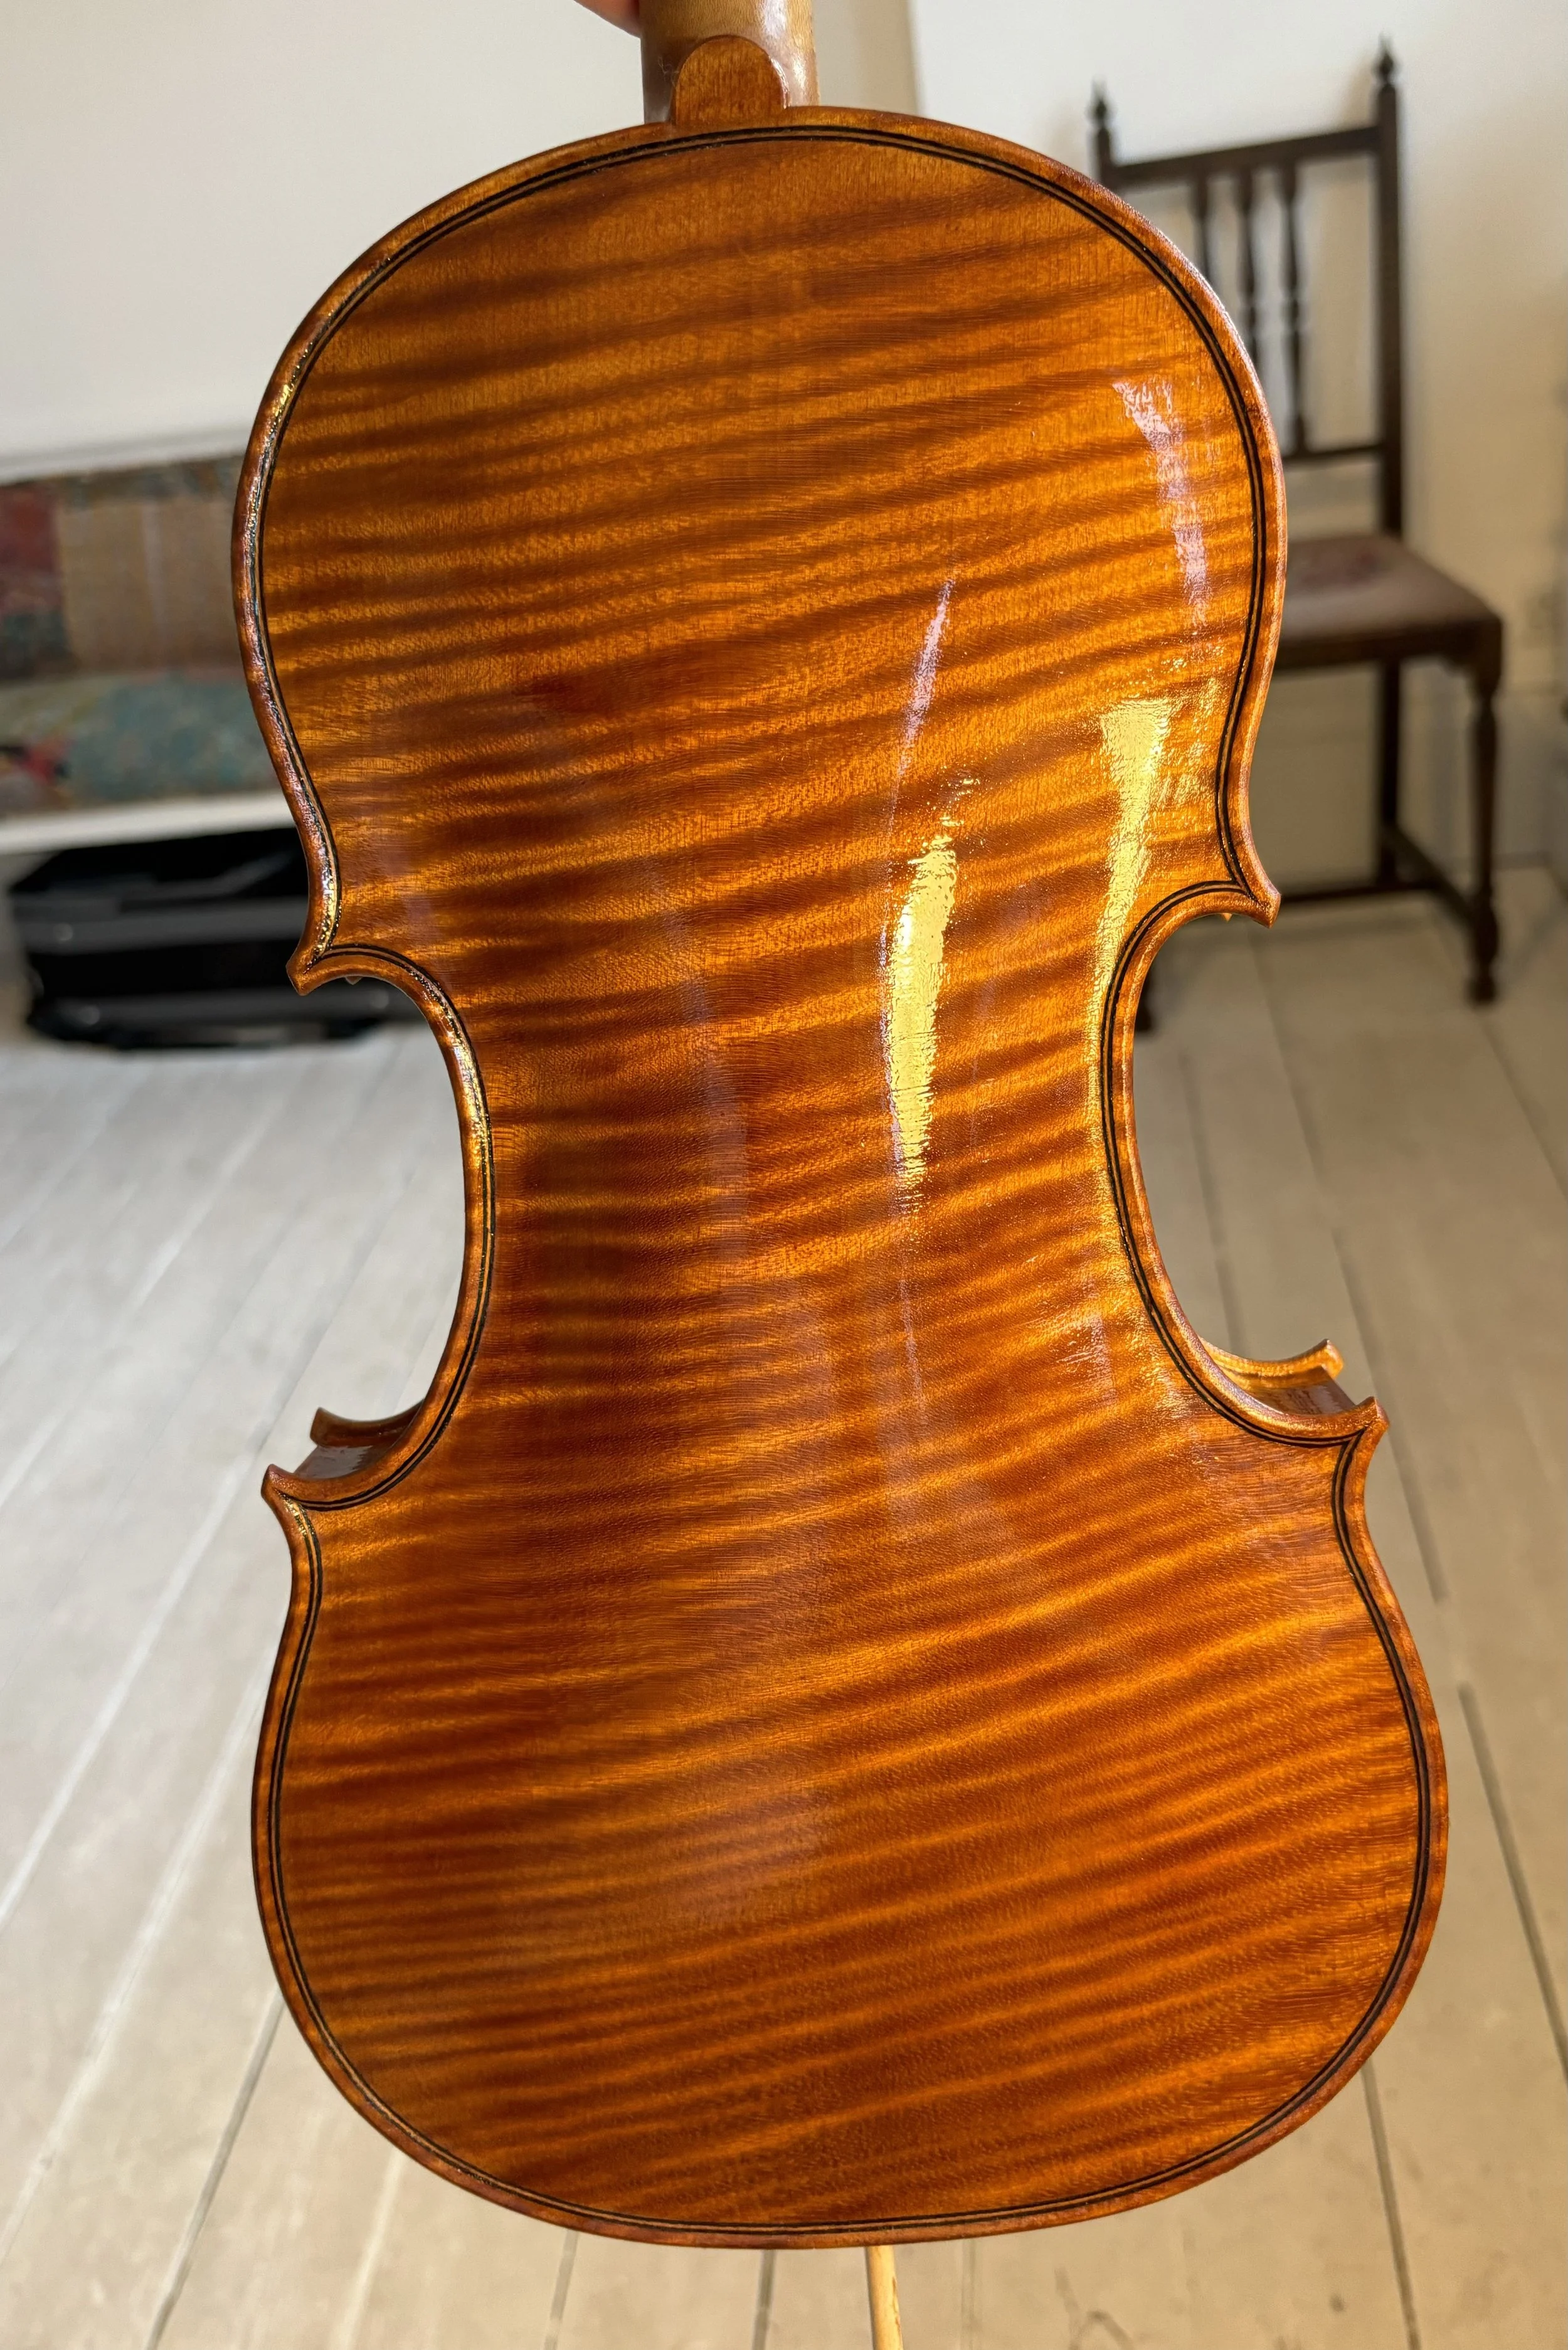
Above: Two stages of a maple violin back being varnished in the Ruschil London workshop. “Clear” varnish (left) & two “colour” coats (right).
Above: Violin, “The Argyle” being varnished with a single coat of “colour” oil varnish.
Below: “The Argyle” freshly varnished with a fine, handmade violin varnish.
The artist’s materials used can be bought from:


